With timber frames set up, install a stud tie/flat strap (30 x 0.8mm min.) fixed to top plate and stud. (This step can also be done after brace is installed)
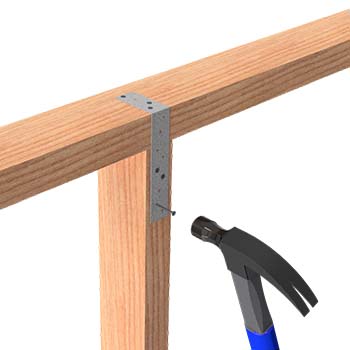
2.
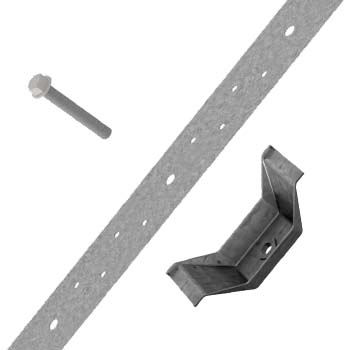
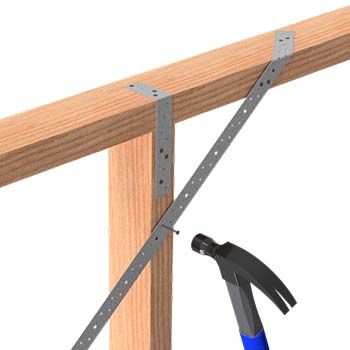
Wrap VUEBRACE over the top of the plate and nail brace to the top plate using 4x 30mm x 2.8mm Ø VUETRADE Galvanised Timber Connector Plate Nails (as per Fixing Detail B of the Technical Data Sheet (TDS) – see note for Fixing Detail A)
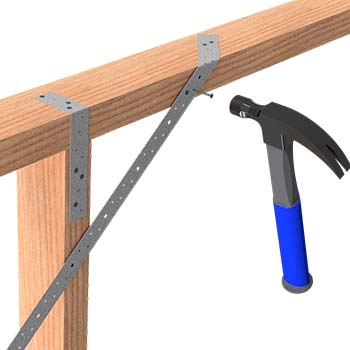
3.
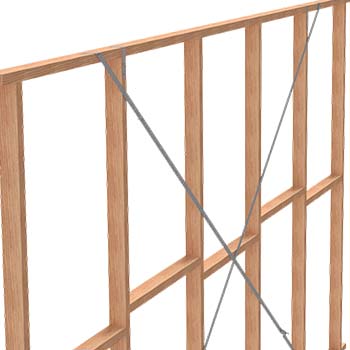
Stretch VUEBRACE at an angle of approximately 45° across the panel length of wall to be braced. Keeping in mind the acceptable panel length shall be within 1.8m to 2.7m, and the acceptable angles are between 30° to 60°. Allow for additional strap for wrap around under the bottom plate.
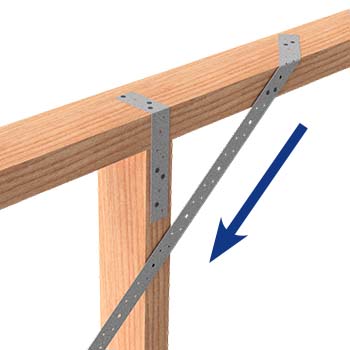
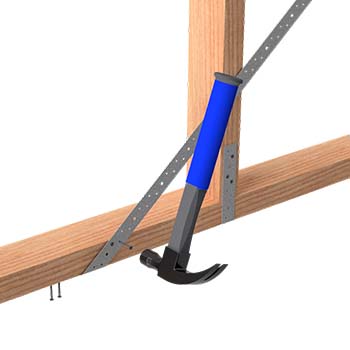
4.
Pull the strap down tightly and wrap brace over the bottom chord and fasten 4x 30mm x 2.8mm Ø VUETRADE Galvanised Timber Connector Plate Nails.
5.
Repeat steps 2 to 4 on the other end, diagonally opposing to the first strap forming a ‘X’ configuration.
6.
Install and tighten VUESMART Tensioners to each strap and drive the tensioner until the strap is taut. Do not overtighten brace.
7.
Finish by installing 1x 30mm x 2.8mm Ø VUETRADE Galvanised Timber Connector Plate Nail to every stud where brace crossed.
Note: For Fixing Detail A of the TDS, Steps 2 & 4 will require 3x 30mm x 2.8mm Ø VUETRADE Galvanised Timber Connector Plate Nails to fasten brace strap to top plate and to fasten brace strap to the bottom plate respectively.