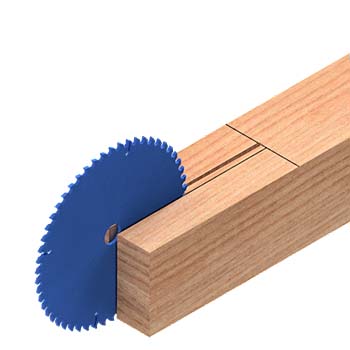
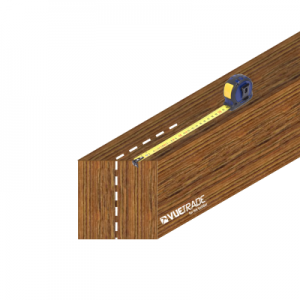
 Step 1: Cut Slot Into Base Of Timber Post
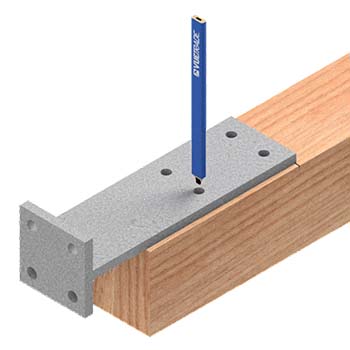
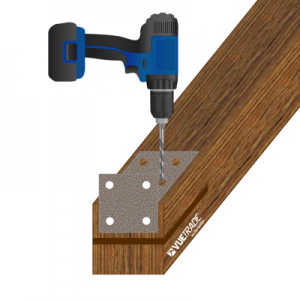 Step 2: Drill Bolt Holes Into Timber Posts
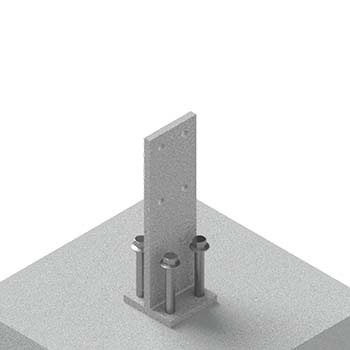
 Step 3: Bolt Down T-Blade Post Support
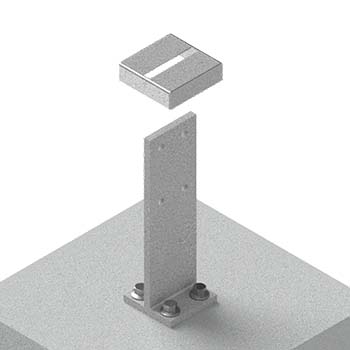
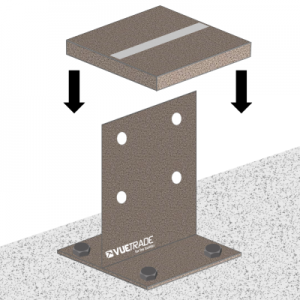 Step 4: Slide Cap Over T-Blade Post Support
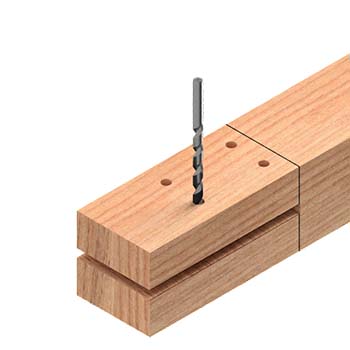
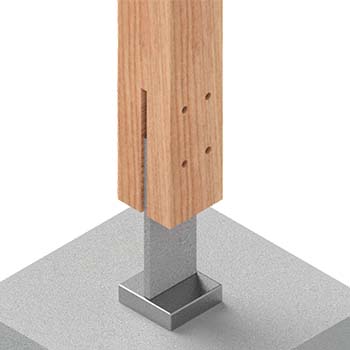
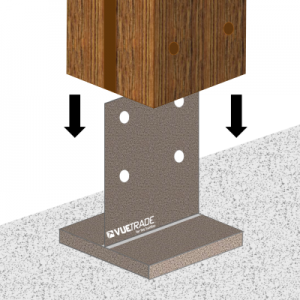 Step 5: Slide Timber Post Over T-Blade Post Support
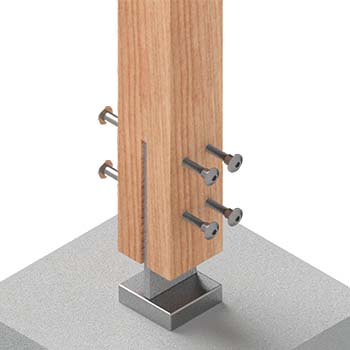
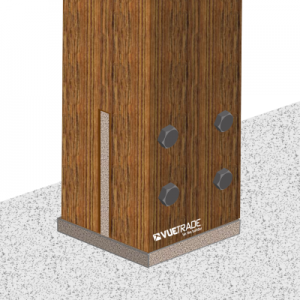 Step 6: Bolt Timber Post Onto The T-Blade Post Support
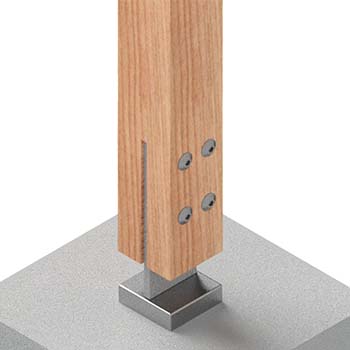